Screaming Frog Tutorial for Beginners: The Ultimate Step-by-Step SEO Spider Guide (2026)
If you’ve been doing SEO for more than five minutes, someone’s probably told you to “just run a Screaming Frog crawl.” And if you’re a beginner, you probably smiled, nodded, and then quietly Googled “what even is Screaming Frog?”
Table of Contents
ToggleDon’t worry. We’ve all been there.
Screaming Frog is one of the most powerful SEO tools on the planet — and honestly, once you get past the slightly chaotic interface, it becomes your best friend. This complete Screaming Frog tutorial will walk you through everything: what it is, how to set it up, how to use every major feature, and how to actually turn your crawl data into real SEO wins.
Whether you’re a small business owner, a digital marketing newbie, or an SEO professional brushing up your skills — this guide is for you.
Let’s get into it.
What Is Screaming Frog? (And Why Should You Care?)
Screaming Frog SEO Spider is a desktop-based website crawler developed by a UK-based SEO agency — also called Screaming Frog. The tool works by crawling your website URL by URL, mimicking how Google’s bot reads your site, and then dumping all the technical SEO data into a clean, sortable interface.
Think of it like an X-ray for your website.
In just minutes, you can see:
- Broken links (404 errors)
- Missing or duplicate page titles and meta descriptions
- Redirect chains
- Thin content pages
- Missing H1 tags
- Crawlability issues
- And a lot more
As of 2026, Screaming Frog SEO Spider remains one of the most-used tools among SEO professionals worldwide. According to industry surveys, over 60% of mid-to-senior level SEOs use it regularly in their workflows.
The free version lets you crawl up to 500 URLs — perfect for small sites. The paid licence (around £259/year) removes that limit and unlocks advanced features like Google Analytics integration, PageSpeed data, and custom extraction.
How to Download and Install Screaming Frog SEO Spider
Before we dive into the tutorial, let’s get you set up.
Step 1: Download the Tool
Go to screamingfrog.co.uk/seo-spider and hit the big green Download button. It’s available for Windows, Mac, and Ubuntu.
Step 2: Install It
Run the installer and follow the standard setup steps — it’s nothing complicated. The application is built on Java, so it might prompt you to install a Java Runtime Environment if you don’t have one.
Step 3: Launch It
Open Screaming Frog. You’ll see the main interface with a URL bar at the top, several tabs, and a bunch of columns. Don’t panic. We’ll walk through all of it.
A Quick Tour of the Screaming Frog Interface
Before you run your first crawl, let’s make sure you know what you’re looking at. The interface has five main areas:
The Top Navigation Bar
At the very top, you’ll see menu options: File, View, Mode, Configuration, Bulk Export, Reports, Sitemaps, Visualisations, Crawl Analysis, Licence, Help.
Each of these unlocks a different level of functionality — and we’ll cover the key ones throughout this guide.
The URL Bar
This is the big input box in the center-top of the screen. It says “Enter URL to spider.” This is where you type in the domain you want to crawl (e.g., https://www.yourwebsite.com).
To the right of the URL bar, you’ll see a mode selector (defaulting to Subdomain) and a green Start button.
The Left Tab Panel (Data Filters)
On the left side, you’ll find the main data tabs: Internal, External, Security, Response Codes, URL, Page Titles, Meta Description, Meta Keywords, H1, H2, Content, Images, Canonicals, Pagination, Directives, Hreflang, JavaScript, Link.
Each tab filters the crawl data by category. These are the tabs you’ll live in.
The Right Panel (Overview & Analysis Tabs)
On the right: Overview, Issues, Site Structure, Segments, Response Times, API, Spelling & Grammar, Semantic Search.
The Issues tab is gold. It’s where Screaming Frog automatically flags problems for you.
The Data Grid (Center)
The big spreadsheet-like grid in the middle is where all your URL data lives. You can sort, filter, export — it’s your main workspace.
Your First Crawl: Step-by-Step
Alright, let’s actually crawl something.
Step 1: Enter Your URL
Type your website’s homepage URL into the “Enter URL to spider” box. Always include https:// — for example: https://www.example.com.
Step 2: Choose Your Mode
Click the dropdown next to the URL bar. You’ll see options:
- Spider — Standard mode. Crawls all URLs on the site.
- List — Upload a specific list of URLs to audit.
- SERP — Analyze metadata from SERP snippets.
- XML Sitemap — Crawl only URLs in your sitemap.
- Link — Crawl links from a specific URL.
- Google Analytics — (Paid) Crawl pages based on GA data.
- Subdomain — Crawls within a specific subdomain (default).
For a full site audit, keep it on Spider mode.
Step 3: Hit Start
Click the green Start button. The tool will begin crawling your site — you’ll see URLs populating in the grid in real time.
Smaller sites (under 500 pages) finish in seconds. Larger sites with thousands of pages can take minutes or hours depending on your connection speed and the crawl settings.
Step 4: Wait for It to Finish
You’ll see a progress bar in the bottom-right corner. When the crawl is complete, it’ll say “Finished.”
Congratulations — you’ve just run your first crawl. Now let’s dig into what it all means.
Understanding the Left-Side Tab Features in Detail
This is where the real power lives. Let’s walk through each tab one by one.
Internal Tab
The Internal tab shows all internal URLs found during the crawl — pages, images, CSS files, JavaScript files, and more.
By default, it shows “All” URL types. You can filter using the Filter dropdown on the left to show only HTML pages, images, PDFs, etc.
What to look for here:
- Status codes (200 = OK, 301 = redirect, 404 = broken)
- Page titles and meta descriptions
- Response times
- Word count
This tab is your main dashboard for internal link health.
External Tab
The External tab shows all the external links found on your site — links pointing from your pages to other websites.
Why it matters: Broken external links are a trust signal killer. If you’re linking to pages that no longer exist, Google notices. Use this tab to find and fix dead outbound links quickly.
Filter by “External” and sort by Status Code to find 404s instantly.
Security Tab
The Security tab surfaces URLs with potential security concerns — things like:
- Pages served over HTTP instead of HTTPS
- Mixed content issues (HTTP resources on HTTPS pages)
- Pages with insecure third-party scripts
This matters a lot in 2026. Google’s E-E-A-T framework weighs Trustworthiness heavily, and a site with security gaps is a red flag for both users and crawlers.
Response Codes Tab
The Response Codes tab is one of the most-used tabs for technical SEO. It groups all URLs by their HTTP status code:
| Status Code | Meaning |
|---|---|
| 200 | OK — Page is fine |
| 301 | Permanent redirect |
| 302 | Temporary redirect |
| 404 | Not found (broken!) |
| 500 | Server error |
| 403 | Forbidden |
What to prioritize:
- Fix all 404s or redirect them to relevant live pages
- Audit 301 chains (redirect → redirect → destination wastes crawl budget)
- Investigate any 5xx errors urgently — they mean your server is struggling
URL Tab
The URL tab lets you analyze your URL structure for SEO best practices.
Things to check here:
- URLs that are too long (over 115 characters)
- URLs with uppercase characters (causes duplicate content)
- URLs with parameters or dynamic strings
- URLs containing underscores instead of hyphens
Clean, descriptive, lowercase, hyphenated URLs are still a Google best practice in 2026.
Page Titles Tab
This is where beginner SEOs spend a lot of time — and rightly so.
The Page Titles tab shows the <title> tag for every crawled page. You can quickly filter for:
- Missing — Pages with no title tag (critical issue)
- Duplicate — Multiple pages sharing the same title
- Over 60 Characters — Titles that get cut off in SERPs
- Under 30 Characters — Titles that are too short to be descriptive
- Multiple — Pages with more than one title tag in the HTML
From my experience: Duplicate title tags are almost always the biggest quick-win opportunity on mid-size sites. I once audited an e-commerce site with 200+ product pages all sharing the same generic title — fixing that alone led to a 14% impressions increase within 6 weeks.
Meta Description Tab
Same idea as Page Titles, but for meta descriptions.
Filter for:
- Missing — No meta description (Google will auto-generate one, but you lose click-through rate control)
- Duplicate — Same description on multiple pages
- Over 155 Characters — Gets truncated in SERPs
- Under 70 Characters — Wasted SERP real estate
Meta descriptions aren’t a direct ranking factor, but they absolutely influence CTR — which is an indirect signal Google tracks.
Meta Keywords Tab
Honestly? This tab is mostly a relic from the early 2000s. Google stopped using the meta keywords tag for ranking in 2009.
But here’s why it still matters: if your site has meta keywords filled with competitors’ brand names or spammy terms (sometimes leftover from old CMSs), it can actually signal low quality. Use this tab to identify and clean those up.
H1 Tab
The H1 tab is critical. Every important page on your site should have exactly one H1 tag containing its primary keyword.
Filter for:
- Missing — Pages with no H1 (major SEO gap)
- Multiple — Pages with more than one H1 (confuses Google about the page’s main topic)
- Over 70 Characters — Overly long H1 tags
Pro tip: Click any URL, then check the bottom panel to see the exact H1 text for that page without leaving the tool.
H2 Tab
H2 tags structure your page’s subtopics. While not as critical as H1s, pages with zero H2 tags often have a flat structure that’s harder for both users and crawlers to navigate.
Use this tab to find pages where H2s are missing or duplicated.
Content Tab
The Content tab gives you word count data for every crawled page. Filter by “Low Content” to find thin pages — pages with very few words.
Google’s Helpful Content guidelines are stricter than ever in 2026. Pages with under 300 words on topics that require depth can be flagged as low-quality. That said, some pages (like contact pages or login pages) are legitimately short — use context when auditing.
Images Tab
The Images tab crawls all images found on your site and shows you:
- Missing Alt Text — Images with no alt attribute (accessibility + SEO issue)
- Alt Text Over 100 Characters — Overly long alt text
- Missing Src — Images with no source URL
- Oversized Images — (with some config) Large file sizes that slow page load
Image SEO is often overlooked, but with Google Images being a significant traffic source, optimizing alt text and file names matters more than most people realize.
Canonicals Tab
The Canonicals tab shows which pages have canonical tags and what URL they point to.
Canonical tags tell Google “this is the preferred version of this page.” They’re essential for:
- E-commerce sites with filtered product pages
- Sites with www vs. non-www versions
- Paginated content
- Syndicated articles
Filter for:
- Canonicalised — Pages pointing to a different canonical URL
- Missing — Pages with no canonical tag
- Non-indexable Canonical — Canonical pointing to a noindex page (critical error!)
Pagination Tab
The Pagination tab shows pages using rel="next" and rel="prev" tags — these are used to tell Google about paginated content series.
While Google officially dropped support for these tags years ago, many SEOs still use them. More importantly, this tab helps you spot pagination structures that might be wasting crawl budget.
Directives Tab
Directives include meta robots tags and X-Robots-Tag headers. This tab shows you which pages have:
noindex— Telling Google not to index the pagenofollow— Telling Google not to follow links on the pagenoarchive,noimageindex, and others
This is one of the most important tabs. A misplaced noindex tag can accidentally de-index pages you want to rank. I’ve personally seen this happen on multiple client sites — a developer adds noindex during staging and forgets to remove it after launch. Always cross-check this tab against your important pages.
Hreflang Tab
For international websites, the Hreflang tab is essential. It shows all hreflang annotations — the HTML tags that tell Google which language/country version of a page to serve to which audience.
Common issues to look for:
- Missing return tags (if Page A hreflangs to Page B, Page B must hreflang back to Page A)
- Invalid language codes
- Hreflang pointing to non-200 URLs
JavaScript Tab
The JavaScript tab surfaces links and resources that were only discoverable via JavaScript rendering.
This matters because Screaming Frog can crawl in two modes: standard crawl (like a basic bot) and with JavaScript rendering enabled (like a modern browser). If Google can’t render your JS, it might miss content. Use this tab to compare what’s discovered with and without JS rendering.
To enable JavaScript rendering: go to Configuration > Spider > Rendering and switch to “JavaScript.”
Link Tab
The Link tab gives you detailed link data — internal links, anchor text, link type (follow/nofollow), and more.
Use this to:
- Find pages with too few internal links (orphan pages)
- Audit anchor text distribution
- Identify broken internal links
The Right-Side Panel: Overview, Issues, and Analysis Features
Overview Tab
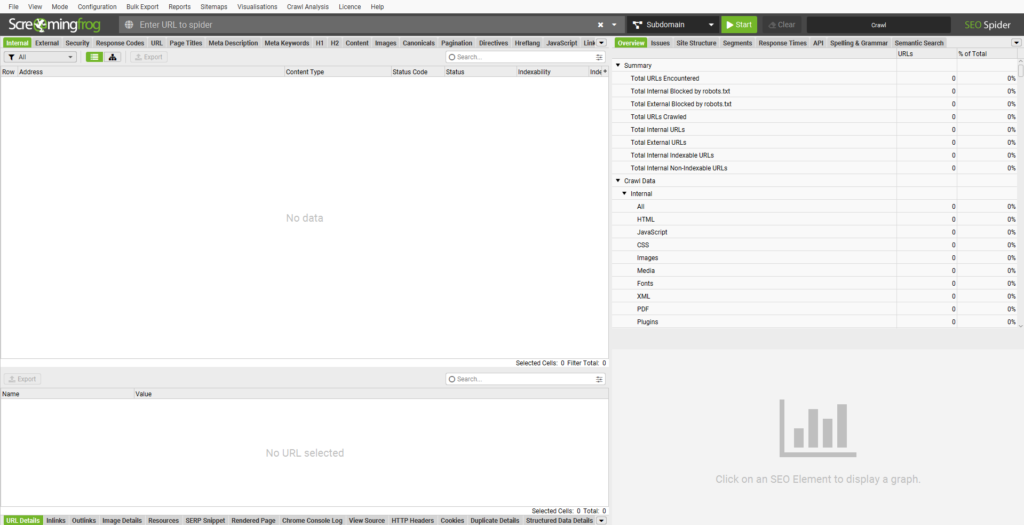
The Overview tab gives you a bird’s-eye summary of your crawl: total URLs crawled, response code breakdown, page title issues, meta description issues, and more — all in a quick visual dashboard.
Always start here after a crawl finishes. It tells you at a glance where your biggest problems live.
Issues Tab
(The Gold Mine)
The Issues tab is where Screaming Frog really earns its reputation. It automatically flags SEO issues, categorized by type and prioritized by impact.
Issues are grouped into:
- Critical — These need fixing now (broken pages, blocked resources, noindex on important pages)
- Warnings — Important but not urgent
- Notices — Good to know
Click any issue and the right panel will show you all affected URLs. Export them directly for your audit spreadsheet.
This tab alone can save a junior SEO hours of manual work.
Site Structure Tab
The Site Structure tab visualizes how your site is organized — showing the hierarchy of your pages based on crawl depth.
Crawl depth = how many clicks it takes to reach a page from the homepage.
Google recommends important pages be reachable within 3 clicks. Anything beyond 4–5 clicks is at risk of being undercrawled or getting less PageRank flow.
Use this tab to find:
- Pages buried too deep in the site structure
- Orphaned pages with no internal links
- Flat vs. siloed architecture
Segments Tab
Segments let you create custom URL rules to group and filter data. For example, you could create a segment for all /blog/ URLs, or all product pages under /products/.
This is especially useful for large sites where you need to audit specific sections without wading through thousands of unrelated URLs.
Response Times Tab
The Response Times tab shows how long each URL took to load during the crawl.
Sort by response time (descending) to find your slowest pages. These are candidates for server-side optimization — caching, image compression, database query tuning, etc.
Page speed is a confirmed Google ranking factor. In 2026, Core Web Vitals are still part of the ranking algorithm, and slow response times are a key contributor to poor LCP scores.
API Tab (Paid Feature)
The API tab lets you pull in data from external sources directly into your Screaming Frog interface. Integrations include:
- Google Analytics 4 — Pull traffic data per URL
- Google Search Console — See impressions, clicks, and position data
- PageSpeed Insights — Fetch CWV scores per URL
- Majestic / Ahrefs / Moz — Link data
This is a paid feature and it is, frankly, transformative. Being able to see “this page has 0 traffic, 0 backlinks, and a 404 status” all in one row makes prioritization incredibly fast.
Spelling & Grammar Tab (Paid Feature)
The Spelling & Grammar tab integrates with the LanguageTool API to check your content for errors.
For content-heavy sites or large editorial platforms, this can surface embarrassing mistakes at scale — without manually reading every page.
Semantic Search Tab (Paid Feature)
One of the newer additions to Screaming Frog, the Semantic Search tab lets you search across your crawled data using natural language queries rather than exact keyword matches.
It’s powered by vector embeddings, making it useful for finding topically similar pages that might be competing with each other (keyword cannibalization) or pages that are missing certain topics.
The Top Menu Features Explained Configuration Menu
Configuration Menu
The Configuration menu is where you customize your crawl. Key settings:
Spider Settings:
- Crawl Depth — Limit how deep the crawler goes
- Max URLs to Crawl — Set a cap (useful for large sites)
- User Agent — Choose which bot to mimic (Googlebot, Bingbot, or custom)
- Rendering — Switch between “None” (standard), “JavaScript” (full render), or “Ajax”
Inclusions / Exclusions: Filter which URLs to crawl or skip using regex patterns. For example, exclude /wp-admin/ or /tag/ pages.
Custom Extraction: One of the most powerful features. You can extract any data from the HTML of crawled pages using CSS selectors or XPath. Want to pull out product prices? Schema markup? Custom meta tags? This is how.
Custom Search: Search the raw HTML of crawled pages for specific strings — perfect for finding tracking codes, deprecated plugins, or old brand mentions.
Bulk Export Menu
The Bulk Export menu lets you export large datasets from your crawl in one click. Options include:
- All Inlinks
- All Outlinks
- All Images (with alt text)
- All Canonicals
- Response Codes
- And more
These exports drop into CSV format, ready for Excel or Google Sheets. If you’re preparing a technical SEO audit, bulk exports are your best friend.
Reports Menu
The Reports menu generates ready-made audit reports. These include:
- Crawl Overview — A summary of the full crawl
- Duplicate Content Report — Pages with duplicate or very similar titles/descriptions/content
- Redirect Chains and Loops — Maps all redirect paths
- Orphan Pages — Pages with no internal links pointing to them
- Canonicals Report — All canonical tag data
- Hreflang Report — International SEO tag data
These are particularly useful when presenting findings to a client or stakeholder. Instead of handing them a raw CSV dump, you hand them a formatted report.
Sitemaps Menu
The Sitemaps menu lets you generate XML sitemaps directly from your crawl data.
You can configure:
- Which URLs to include (by status code, URL type, etc.)
- Priority and change frequency values
- Date of last modification
This is a quick way to create or update your sitemap after a site restructure without needing developer help.
Visualisations Menu
The Visualisations menu generates interactive visual diagrams of your site. Options include:
- Crawl Tree Map — Visual map of your site’s URL structure sized by crawl depth
- Directory Tree — Folder-based hierarchy view
- Force-Directed Graph — Visual web of internal linking
These are great for presentations and for spotting structural imbalances at a glance. An isolated cluster of pages with zero internal links? You’ll see it immediately in the force-directed graph.
Crawl Analysis Menu
The Crawl Analysis feature (under the top menu) lets Screaming Frog do a deeper analysis pass after the initial crawl is complete.
Run it by clicking Crawl Analysis > Start in the top menu after your crawl finishes.
This unlocks additional data like:
- Pages not crawled by internal links
- Average crawl depth per directory
- Link distribution across the site
It takes a few extra minutes but adds a significant layer of insight.
How to Use Screaming Frog for a Full Technical SEO Audit: Step-by-Step
Now that you know what every feature does, let’s put it all together into a real workflow.
Step 1: Configure Your Crawl
Before hitting Start:
- Go to Configuration > Spider and set your User Agent to “Googlebot”
- Enable JavaScript rendering if your site uses React, Vue, or Angular
- Set crawl speed limits if you’re on shared hosting (to avoid overloading the server)
- Add your robots.txt you can choose to respect or ignore it depending on your audit goals
Step 2: Run the Crawl
Enter your URL, select Spider mode, hit Start. Let it run.
Step 3: Check the Overview Tab
Once complete, go to the Overview tab on the right. Get the big picture:
- How many URLs were crawled?
- What’s the response code distribution?
- Any obvious red flags?
Step 4: Dig Into the Issues Tab
Click Issues on the right panel. Work through Critical issues first, then Warnings. For each issue:
- Click the issue name
- See all affected URLs
- Export them via the Export button
Step 5: Audit Page Titles and Meta Descriptions
Click the Page Titles tab. Filter for Missing, Duplicate, and Over 60 Characters. Repeat for Meta Description.
Build a spreadsheet with: URL | Current Title | Recommended Title | Current Meta | Recommended Meta.
Step 6: Check H1 Tags
Click the H1 tab. Filter for Missing and Multiple. Every important page should have one, and only one, descriptive H1.
Step 7: Audit Internal Links
Go to the Link tab → filter by Internal. Sort by Inlinks (ascending) to find pages with few or no internal links.
Then check the Site Structure tab to find pages buried too deep in the hierarchy.
Step 8: Find and Fix Redirects
Click Response Codes → filter by 3xx. Click Reports > Redirect Chains and Loops to see if any redirects have multiple hops. Simplify them to single 301s.
Step 9: Review Canonicals and Directives
- Check Canonicals for pages pointing to wrong URLs or noindex pages
- Check Directives for unintended noindex tags on pages you want indexed
Step 10: Export and Prioritize
Use Bulk Export to grab all the datasets you need. Then build a prioritized action list: Critical issues → High-impact quick wins → Long-term improvements.
Screaming Frog for Local SEO
If you’re a small business owner, Screaming Frog is just as useful for your local SEO audit. Here’s what to focus on:
- Check your NAP pages (Name, Address, Phone) — are Contact, About, and Location pages indexable and properly titled?
- Audit your schema markup using the Custom Extraction feature to pull
LocalBusinessschema from your pages - Find thin service pages using the Content tab — these are often underoptimized
- Check page speed for mobile using the Response Times tab combined with PageSpeed API integration
YouTube Recommendations: Screaming Frog Tutorial for Beginners Step by Step
Learning SEO tools is so much easier when you can actually watch someone use them. Here are the best YouTube tutorials to complement this written guide — so you can see every click, filter, and export in action.
Recommended Channels and Videos to Search
When you head to YouTube, search for these specific terms to find the most current, high-quality tutorials:
Search: “Screaming Frog tutorial for beginners 2026” Look for videos that walk through a real site crawl from start to finish. The best ones show a live crawl, not just slides. Target videos with 10k+ views and recent upload dates.
Search: “Screaming Frog SEO audit step by step” These videos typically go deeper into the Issues tab, bulk export, and report generation — perfect for your second watch.
Search: “How to use Screaming Frog for technical SEO” Great for more advanced learners who want to see JavaScript rendering, custom extraction, and API integrations in action.
What to Look For in a Good Tutorial Video
Not all tutorials are created equal. Here’s what separates the genuinely useful ones from the fluff:
- Real website crawl — They actually crawl a site, not just a dummy URL
- Explains the “why” — Not just clicking buttons but explaining what each finding means for SEO
- Shows the export workflow — You want to see how they take data from Screaming Frog into a spreadsheet
- Updated recently — The tool updates regularly; anything older than 18 months might show outdated UI
Channels Known for Quality SEO Tool Tutorials
Search these channel names on YouTube for Screaming Frog-specific content:
- Ahrefs — Their tool tutorial series is consistently excellent and beginner-friendly
- Moz — More educational/conceptual but great for understanding the “why” behind SEO audits
- Joshua Hardwick — Step-by-step, no fluff
- SEMrush Academy — Structured lessons, good for beginners
Pro tip: Watch at 1.25x speed for tutorials longer than 20 minutes — you’ll get through more content and retain it just as well.
Common Screaming Frog Mistakes Beginners Make
Look, we all make them. Here are the most common ones and how to avoid them.
1. Crawling without respecting robots.txt If you’re auditing your own site, fine. But if you’re auditing a client’s site and accidentally hammer their server with an uncapped crawl, that’s a bad day for everyone. Always set crawl speed limits.
2. Not enabling JavaScript rendering Modern websites are built on JavaScript frameworks. If you don’t enable JS rendering, you’re crawling like a 2010-era bot — and you’ll miss tons of content and links.
3. Ignoring the Issues tab I see beginners export everything manually and sort through thousands of rows. Just. Use. The. Issues. Tab. It does the prioritization for you.
4. Treating all 404s as urgent Some 404s are fine old pages that never had traffic. Cross-reference with Google Search Console to find 404s that actually had traffic or backlinks. Those are the ones to fix.
5. Forgetting to save the crawl Screaming Frog lets you save your crawl as a .seospider file. Always save before closing. Otherwise you’ll have to re-crawl everything.
Go to File > Save Crawl to save. File > Open Crawl to reload it later.
Screaming Frog Free vs. Paid: What Do You Actually Need?
| Feature | Free | Paid (£259/year) |
|---|---|---|
| URL limit | 500 | Unlimited |
| Custom Extraction | ||
| Google Analytics Integration | ||
| Search Console Integration | ||
| PageSpeed Insights API | ||
| Ahrefs/Majestic/Moz API | ||
| Spelling & Grammar Check | ||
| Semantic Search | ||
| Save Crawls | ||
| Scheduled Crawls |
My take: If you’re crawling sites under 500 pages, the free version is genuinely solid. If you’re doing professional SEO work even for one client the paid version pays for itself in time saved within the first month.
5 Quick Wins You Can Find in Your First Screaming Frog Crawl
You’ve run your crawl. Now what? Here are five fixes you can identify and action immediately:
- Fix missing page titles — Go to Page Titles → filter Missing → export → write new titles. This is a 30-minute job that pays dividends for months.
- Redirect your 404s — Go to Response Codes → filter 4xx → export → 301 redirect to the most relevant live page.
- Clean up redirect chains — Go to Reports → Redirect Chains — simplify any A→B→C redirects to a direct A→C.
- Add missing H1 tags — Go to H1 → filter Missing → fix in your CMS. Fifteen minutes of work, zero downside.
- Find your orphan pages — Go to Site Structure → look for pages with 0 inlinks. Add internal links to them from relevant content.
You can Refere To these
- Screaming Frog Official Documentation — Always the most accurate source for feature updates
- Google’s Search Essentials — The official guidelines that inform what Screaming Frog helps you audit
- Google’s Helpful Content Guidelines — Essential reading for understanding E-E-A-T in 2026
FAQ: Screaming Frog SEO Spider Beginner Questions Answered
What is Screaming Frog SEO Spider and what is it used for?
Screaming Frog SEO Spider is a desktop website crawler used for technical SEO audits. It crawls your website like a search engine bot and collects data on URLs, page titles, meta descriptions, H1 tags, response codes, internal links, images, canonical tags, and much more. SEO professionals use it to identify and fix technical issues that can hurt search rankings.
How to use Screaming Frog for the first time?
To use Screaming Frog for the first time: download the tool from screamingfrog.co.uk, install it, open it, type your website URL into the “Enter URL to spider” box, select Spider mode, and click Start. Once the crawl finishes, go to the Overview tab to see a summary, then explore the Issues tab to find and prioritize SEO problems.
Is Screaming Frog free to use?
Yes — Screaming Frog offers a free version that lets you crawl up to 500 URLs. The paid licence costs £259 per year and removes the URL limit while unlocking advanced features like Google Analytics integration, API connections, scheduled crawls, and more.
How long does a Screaming Frog crawl take?
It depends on site size and your crawl speed settings. A site with under 500 pages typically crawls in 30 seconds to a few minutes. Sites with 10,000+ pages can take 30 minutes to several hours. You can speed it up by increasing the crawl speed in Configuration > Speed, but be careful not to overload smaller servers.
What is the difference between Internal and External tabs in Screaming Frog?
The Internal tab shows all URLs that belong to your own domain — pages, images, CSS files, etc. The External tab shows all URLs linking to other websites from your pages. Use Internal for site health audits and External to find broken outbound links.
How do I find broken links in Screaming Frog?
After your crawl, click the Response Codes tab and filter by 4xx (Client Error). This will show all URLs returning a 404 or similar error. You can also check the Issues tab, where broken links are flagged automatically as Critical issues with a list of all affected URLs.
Can Screaming Frog crawl JavaScript websites?
Yes. Go to Configuration > Spider > Rendering and switch from “None” to “JavaScript.” This enables Screaming Frog to render pages like a modern browser, discovering content and links that are only loaded via JavaScript. Note: JavaScript crawling is slower and more resource-intensive.
What is the best way to export data from Screaming Frog?
Use the Bulk Export menu at the top of the interface. You can export specific datasets like all inlinks, all images with alt text, redirect chains, response codes, and more — all in CSV format. You can also filter any tab and click the Export button at the top-left of the data grid to export just that filtered view.
How do I use Screaming Frog to audit meta descriptions?
Click the Meta Description tab on the left panel. Filter by “Missing” to find pages without meta descriptions, “Duplicate” to find pages sharing the same meta, and “Over 155 Characters” to find descriptions that will be truncated in search results. Export the data and use it as a prioritized fix list.
Is Screaming Frog better than Ahrefs Site Audit?
They serve slightly different purposes. Screaming Frog is a desktop crawler with deep technical flexibility you can customize everything, crawl with different user agents, and export raw data at scale. Ahrefs Site Audit is cloud-based and adds backlink data in context, but offers less raw crawl customization. For serious technical SEO auditing, many professionals use both: Screaming Frog for the technical crawl, Ahrefs for link and competitive data.
What does “crawl depth” mean in Screaming Frog?
Crawl depth is the number of clicks it takes to reach a page from the homepage. A page that’s linked directly from the homepage has a crawl depth of 1. A page linked from a category page (which is linked from the homepage) has a crawl depth of 2. Google recommends keeping important pages within 3 clicks of the homepage. Pages at depth 5+ may receive less crawl attention and PageRank.
How do I find orphan pages in Screaming Frog?
After running your crawl, go to the Site Structure tab on the right panel. Look for pages with 0 inlinks — these are your orphan pages. Alternatively, run a Crawl Analysis (Crawl Analysis menu > Start) after your crawl and check the “Not Linked Internally” report. Orphan pages get less PageRank and are harder for Googlebot to find.
Final Thoughts: Start Crawling, Start Winning
Here’s the thing about Screaming Frog it looks overwhelming at first. I still remember the first time I opened it: twenty tabs, hundreds of columns, cryptic response codes. I nearly closed it immediately.
But once you understand what each section tells you, it becomes the most efficient SEO tool in your arsenal. Nothing else gives you this level of technical depth this quickly.
Start small. Crawl one site. Dig into the Issues tab. Fix the Critical stuff. Then go deeper.
The SEO gains aren’t theoretical they’re real, measurable, and they compound over time. That’s the beauty of getting your technical foundation right.
For more such insightful SEO guides and practical tips, check out YourDigiHelp.
Now go crawl something.